3. Circular fashion
📆 2020 - October 6th to 13th
What I made this week
Open-source modular patchwork blocks:
Modular blocks inspired by the "Drunkard's Path" traditional Patchwork blocks
How did I get there?
This week's lecture, by Zoe Romano, was about the current system of the fashion industry, and the ways we could find alternative models to change it.
Around 100 years after the industrial revolution, mass manufacturing in the fashion industry produces around 80 billion of garments annually. The industry accounts for 10% of total greenhouse gas emissions, and environmental and social issues are an inherent part of it (water usage & pollution, working conditions & wages around the world...).
Fashion does not have a culture of openness, but of secrecy and authority, mostly based on the history of craft guilds. For example it is very rare to see fashion houses sharing their patterns, even though the shape of a garment is not patented (it is considered utilitarian; in fashion, only trademarks are protected).
"Society is now about exchange and working together, which happens in a lot of disciplines, yet not in fashion" - Li Edlekoort
What does innovation mean in the fashion world right now? Can we go from something driven by a growth logic (producing faster, selling more), to an innovation that focuses on sustainability? How can we hack the fashion industry?
We need new perspectives on how to organize fashion businesses. Some companies and projects already entered this paradigm, and have a different and innovative approach on this topic.
- Make/Use: providing a toolset to make customizable, zero-waste garments
- Paynter: reversing the production-selling organisation, by selling first and producing only what is needed
- AnOtherShoe, sharing knowledge to produce shoes locally and in a small scale
Modular fashion
Modular fashion is an approach that uses vector design and laser cutting to produce seamless clothing:
- they are ideally zero waste, using tessellation to fill the material
- the created modules are interlocked together, instead of sewn
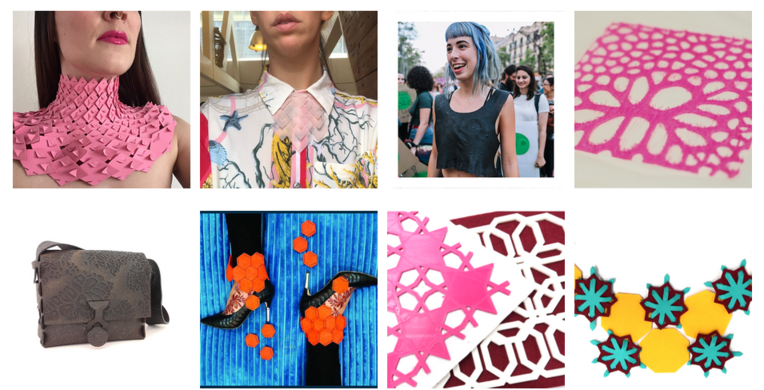
Here are some examples from artists and designers:
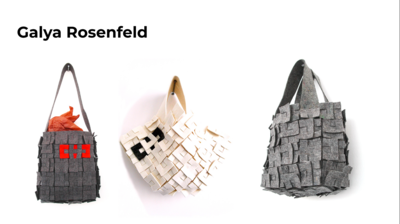
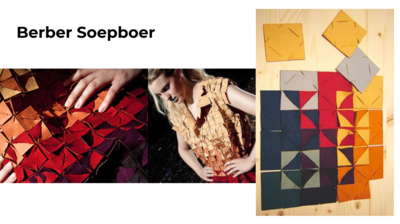
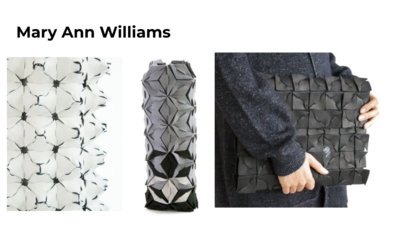

And of course, there is also the the Open Source Circular Fashion platform, which is filled with open-source modular designs from Fabricademy alumni:
Inspiration
A lot of different ideas came to my mind when thinking about modular designs:
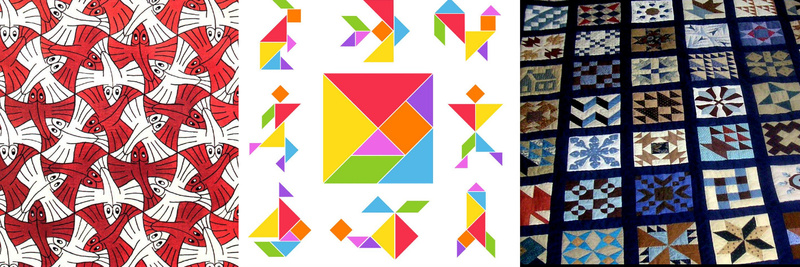
A tesselation by M.C. Escher, a game of Tangram, and a patchwork made by my mother and her friends
I decided to focus on patchwork, for a few different reasons:
- Historically, the principle of patchwork is to reuse scraps of fabric to create something new. When quilted, they become a long-lasting object that is sometimes passed down from one generation to another;
- The geometric shapes and way they are assembled make them easily translated to modularity. These shapes are also widely shared among patchwork communities, who sometimes create big pieces by working together;
- Patchwork is very dear to my heart, as it is my mother's main hobby. She sometimes spends hours arranging the shapes and colors to create them. I have one that she made out of clothes I used to wear as a child.
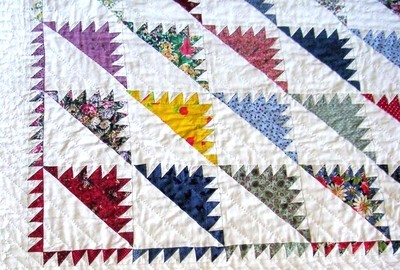
Part of patchwork made by mother, with clothes I used to wear as a child
Here are some very geometric basic blocks that I like:
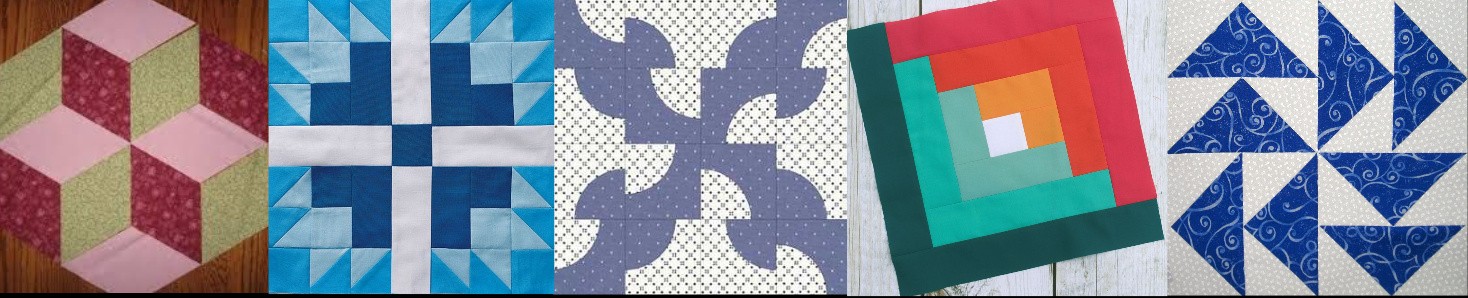
From left to right, Tumbling Blocks, Bear's Paw, Drunkard's Path, Log Cabin and Flying Geese
I decided to try out the following two, because they can be arranged in so many different ways:
Log Cabin
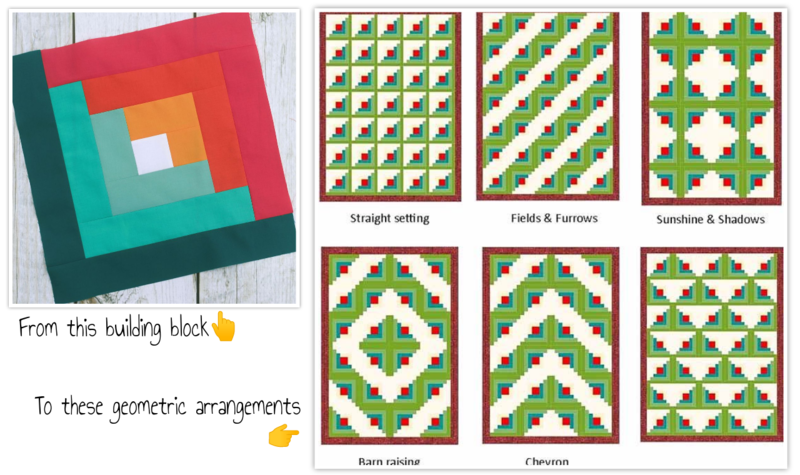
The many ways to arrange log cabin blocks
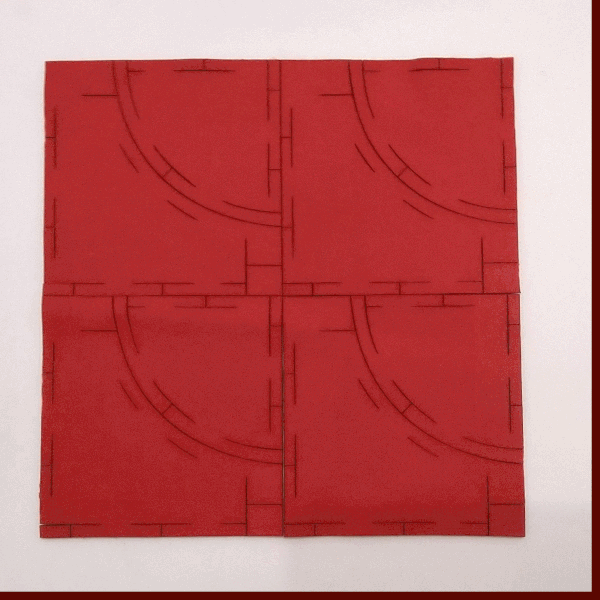
Drunkard's Path
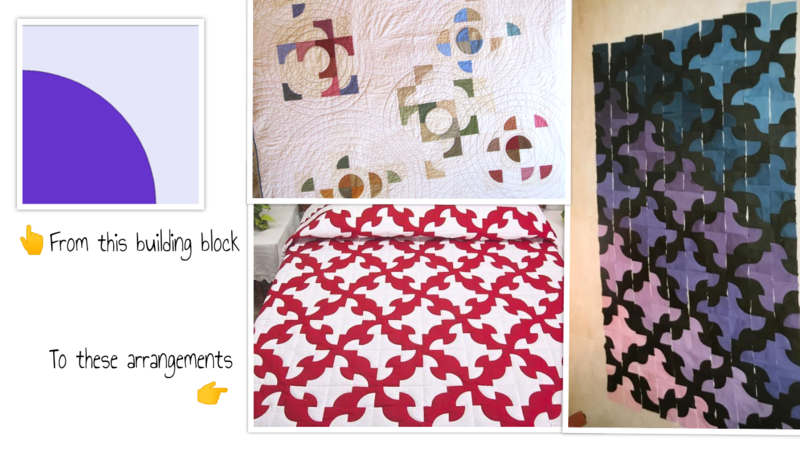
Traditional and modern Drunkard's Path (from this article and from my mother for the one on the far right)
Designing with paper
I first tried to recreate a Log Cabin:
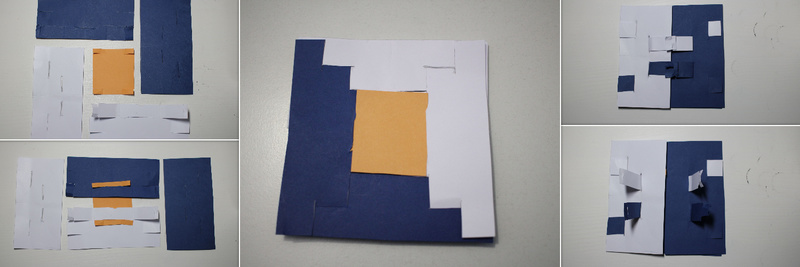
Trying to make a Log Cabin out of paper
Here the modular shapes are very simple, rectangles with long tabs inserted, and there is a lot of overlay between the pieces. It does hold together pretty well on its own, but i did not like it enough to go on with it and design side joints to link two of them together.
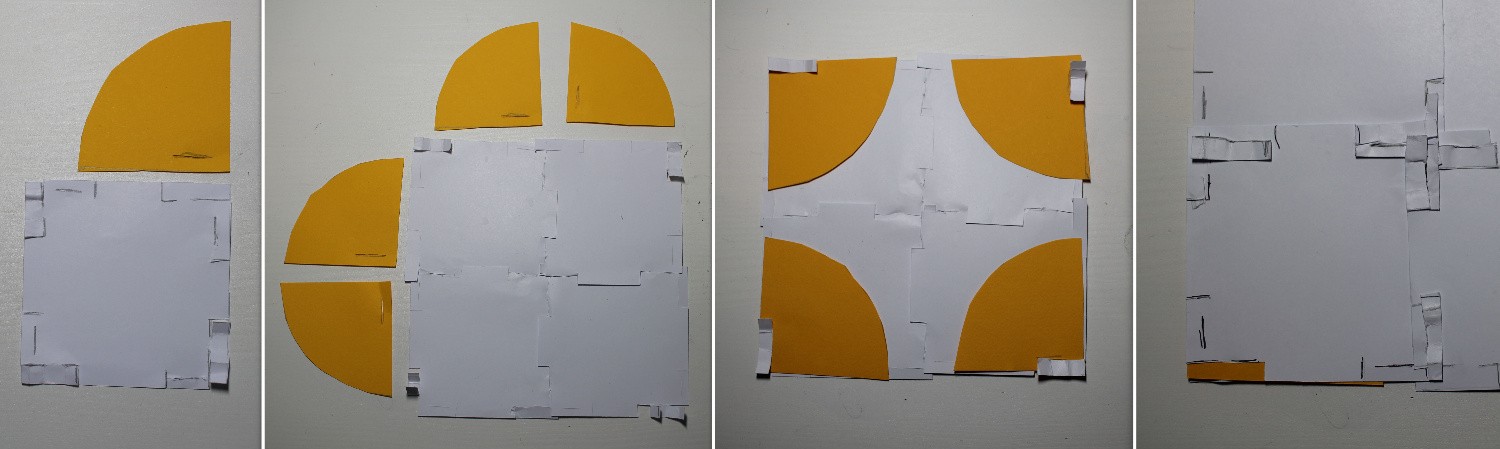
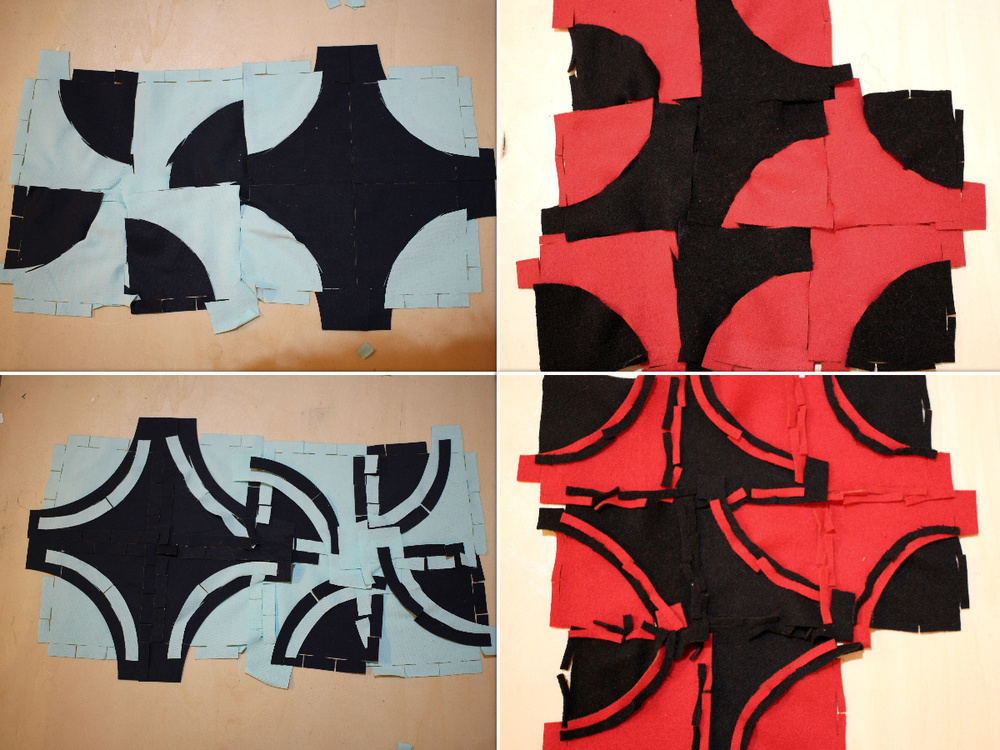
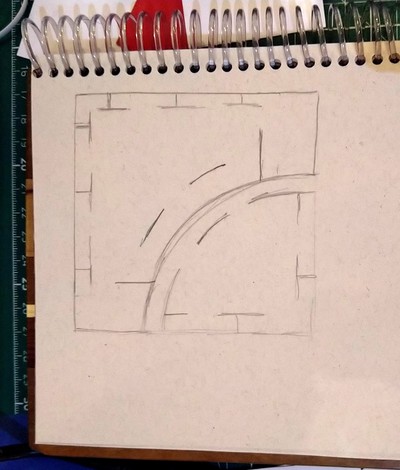
Trying to make a Drunkard's Path out of paper
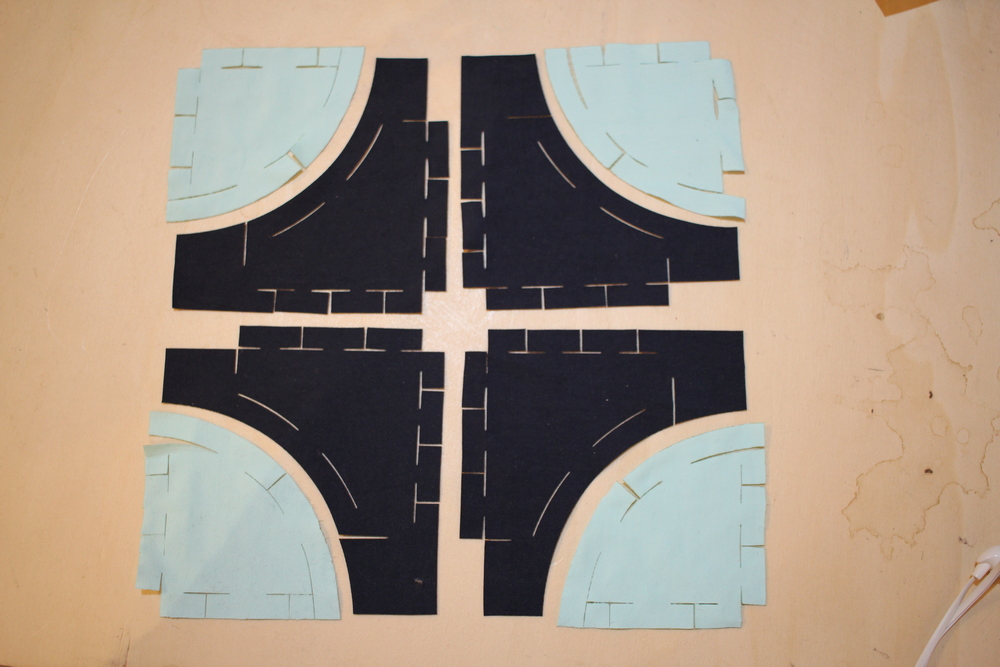
This first version also has an overlay: the circle is attached over the square, on the tab that interlocks two squares together. Following Pauline's advice, my next version had these two modular parts: a quarter circle and the corresponding hollowed out square:
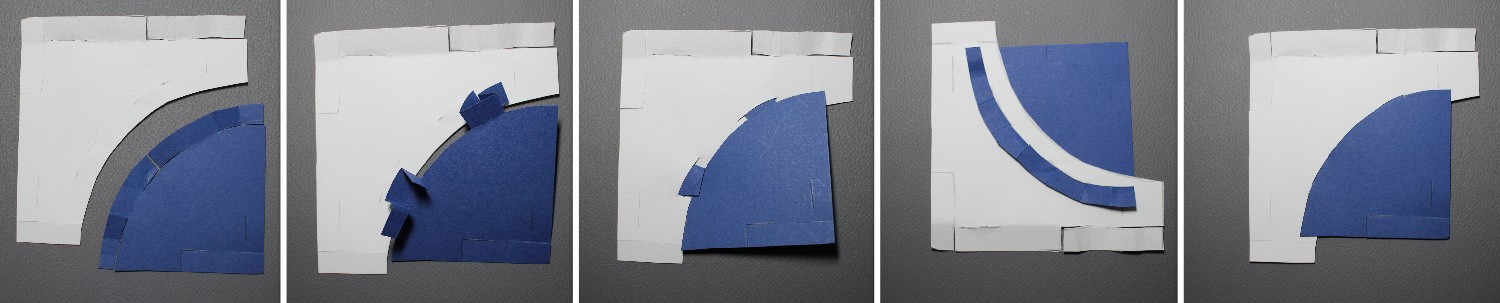
Two modules for the Drunkard's Path, and how to interlock them
I really wanted to be able to assemble any two sides together, so I spent a lot of time trying to find closures that could work for that. I got inspired by last year's following projects:
I finally went with the tabs all along the sides, like Valentine's diamonds, as it allowed for less waste when cutting. It does allow assembling on all sides... if I use both sides of the modules.
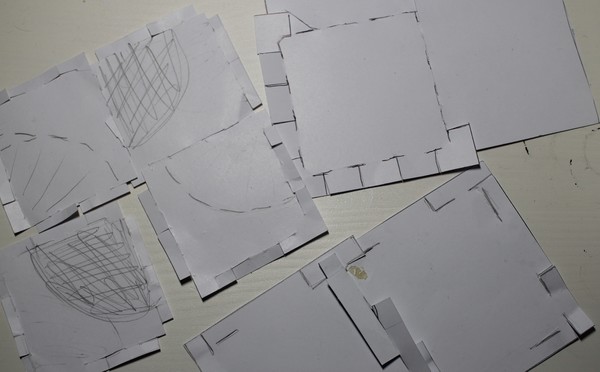
Trying to make everything fit with everything
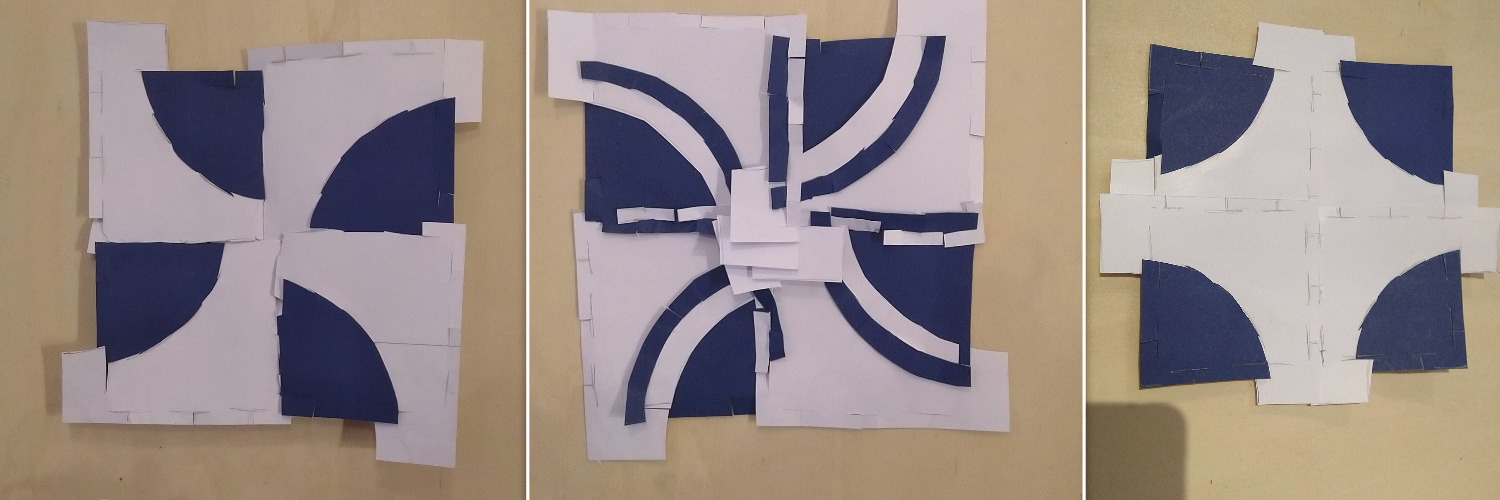
Assembling the paper modules
The bigger tabs on the back are there only because cutting them wastes more material. I might end up cutting them anyway if they are too bulky... But now let's try it on fabric!
Digital design
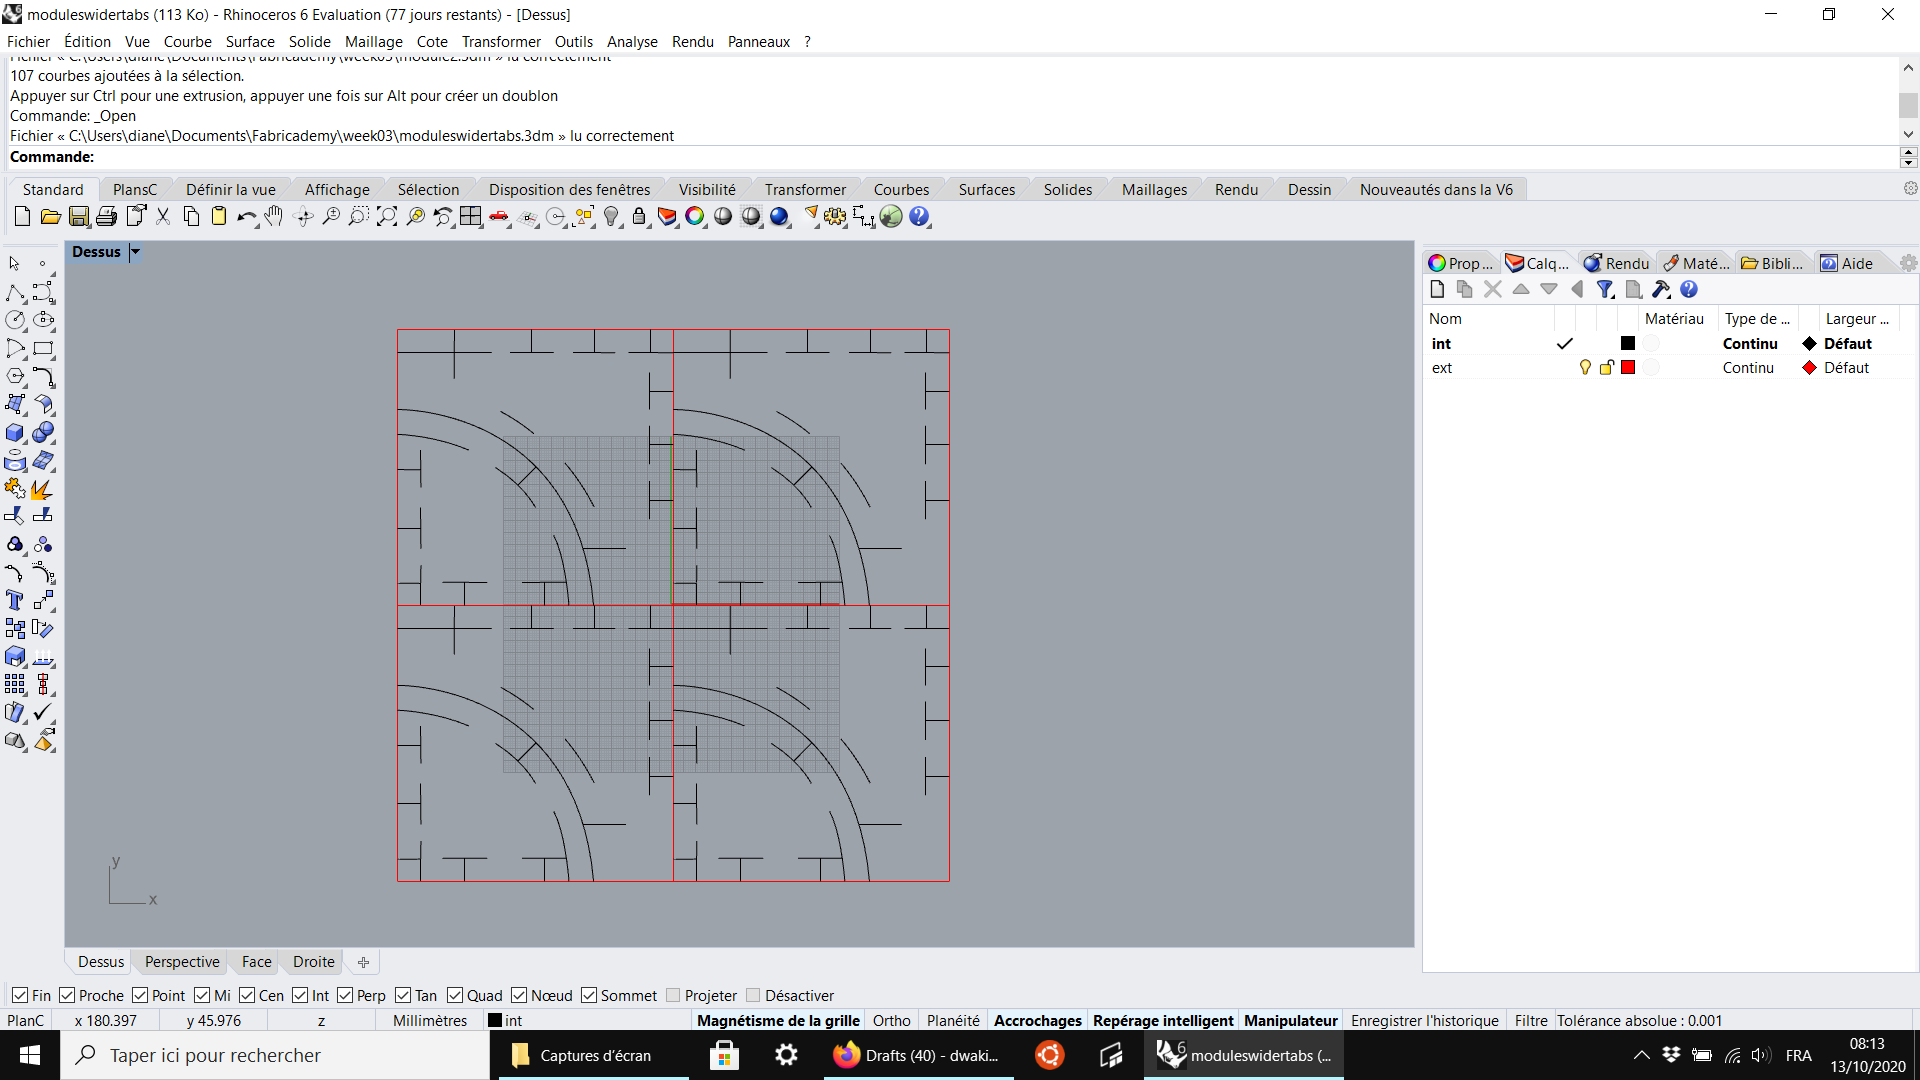
I first designed the plan in Rhino, by creating simple geometric shapes and then cutting and limiting them as I wanted:
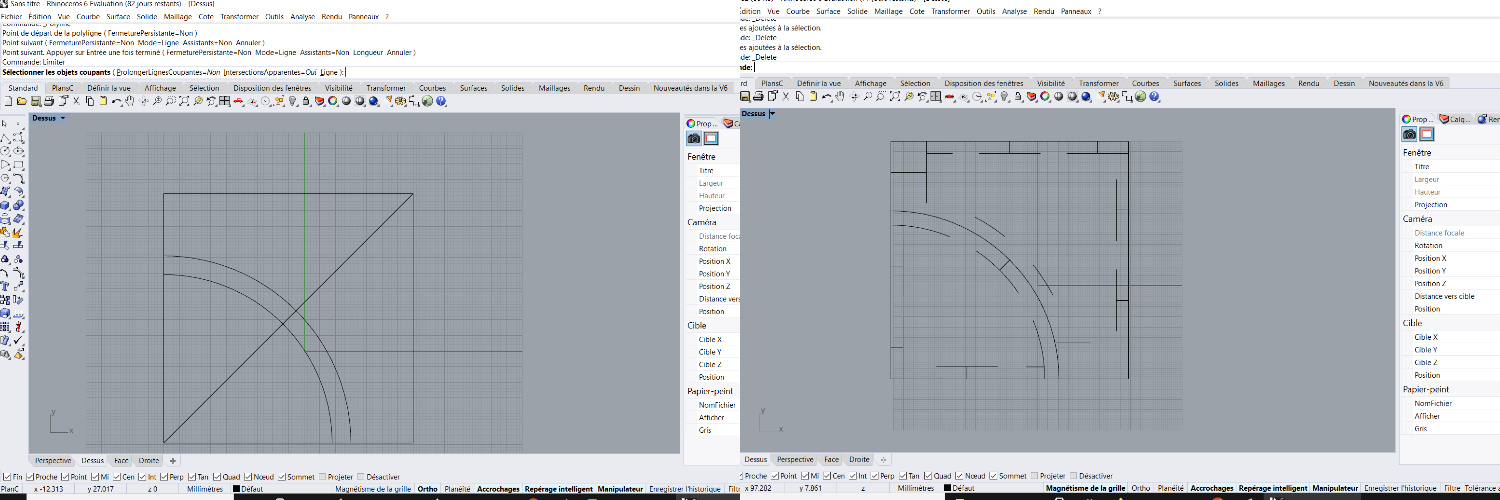
But when I imported it in Voxelizer, our laser-cutting machine software, I got these weird lines, and my curves were distorted:
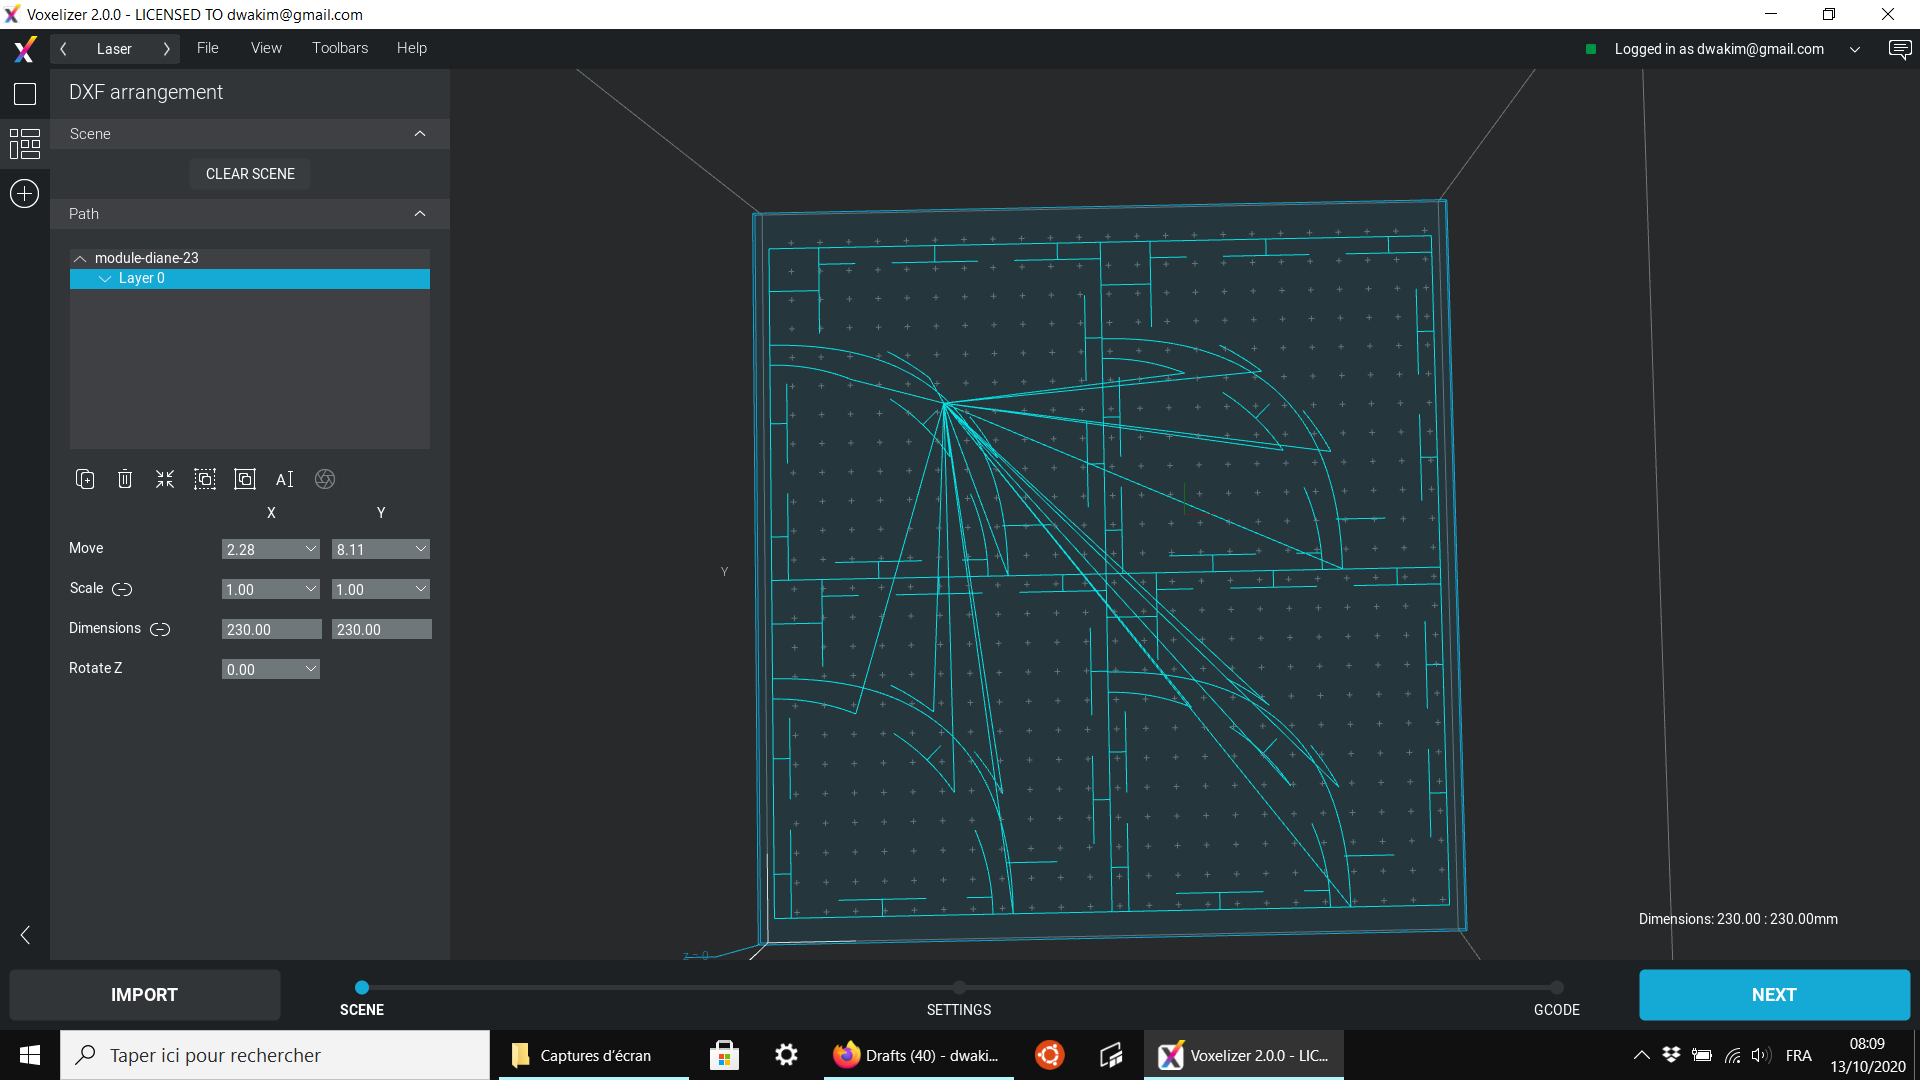
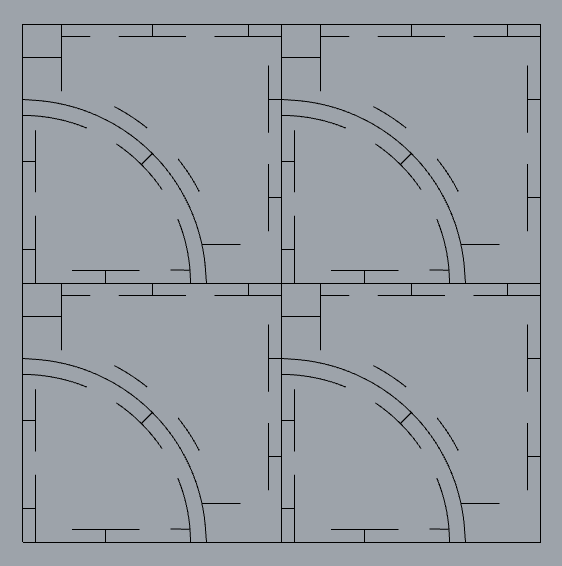
I probably had some points left somewhere in the lines, but I couldn't find them. I did not manage to solve this problem, so I designed the plan in another software, Affinity, and then imported it back in Rhino to duplicate it and divide the layers:
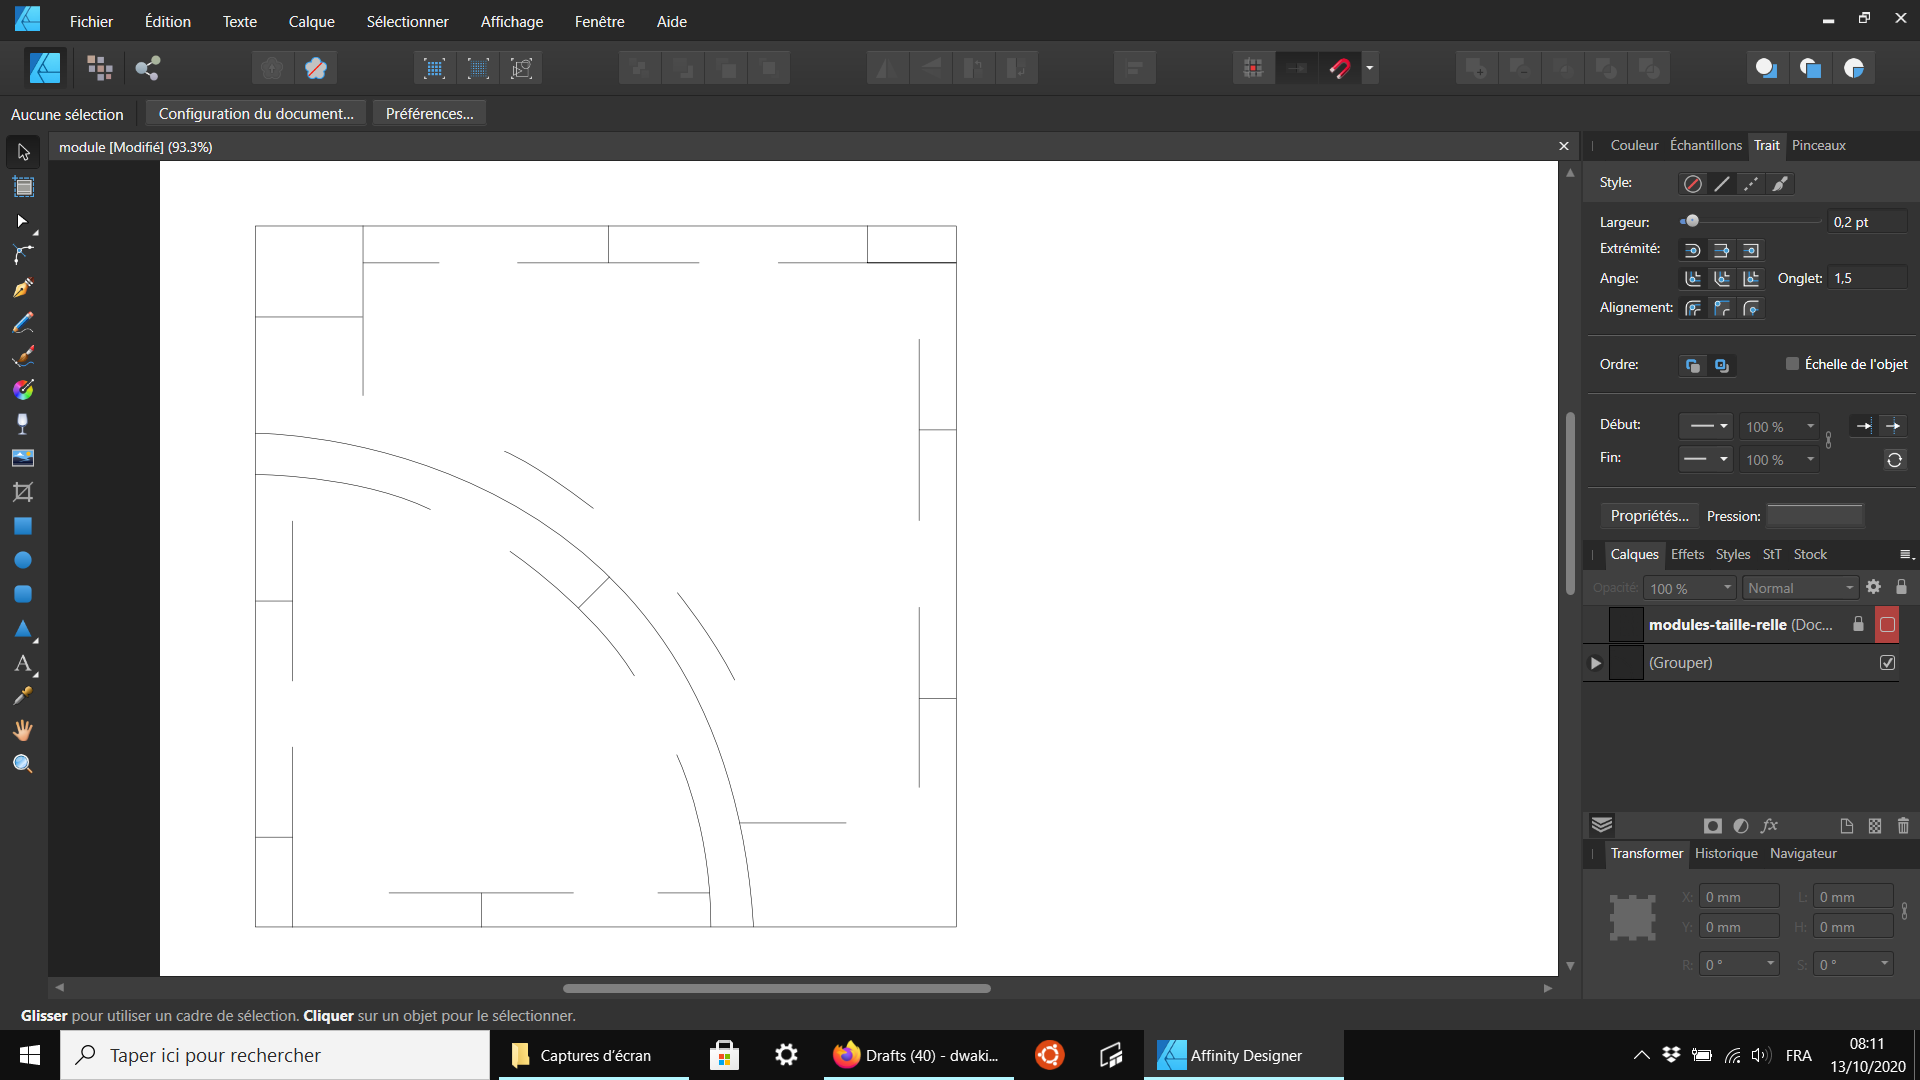
I did not use a specific tool to optimize the nesting, as it was quite simple here: I only have squares. The only important thing I had to do was make sure there were no duplicate lines on the border of the squares. I did this by decomposing the lines and joining them as one.
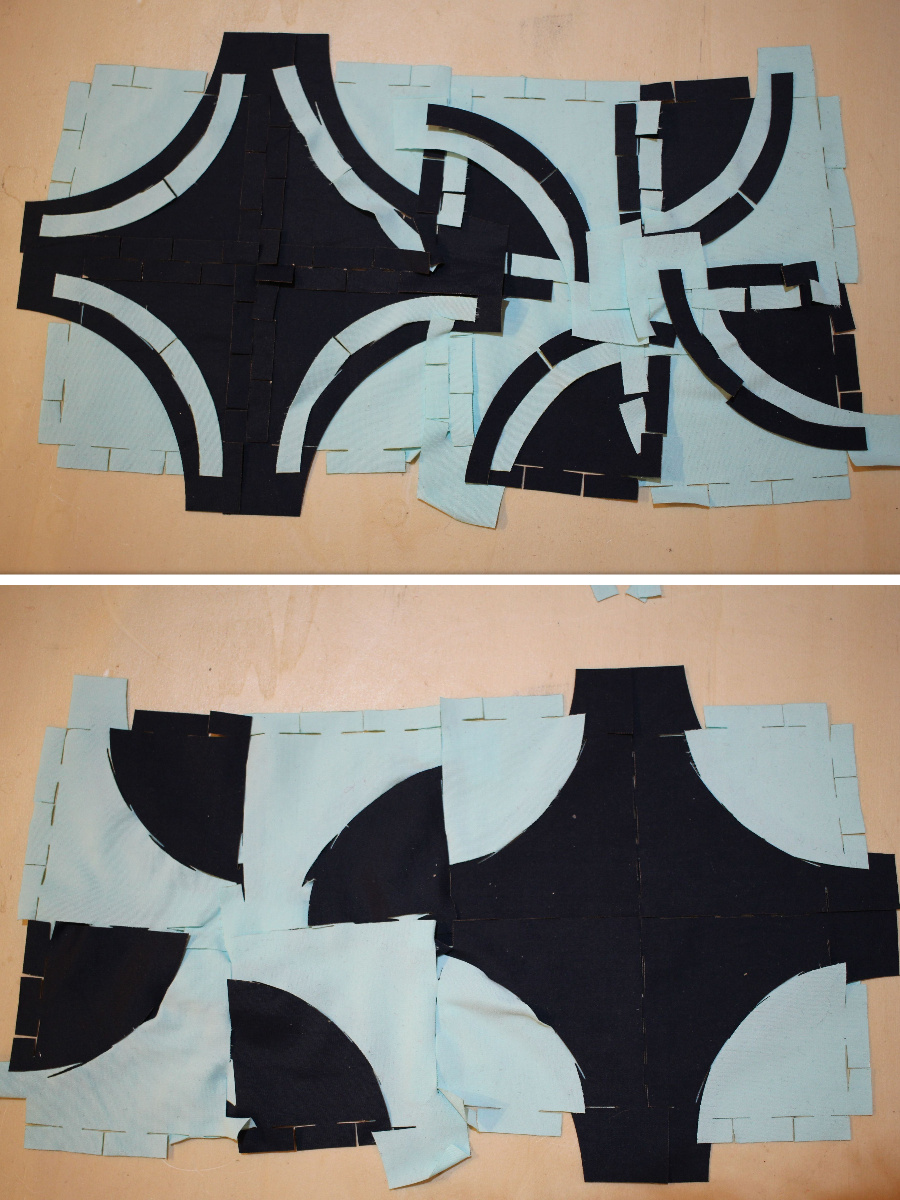
Testing the cut
I first tested with wool and felt:
The first felt cut - on the last frame, the little squares on the right are the waste
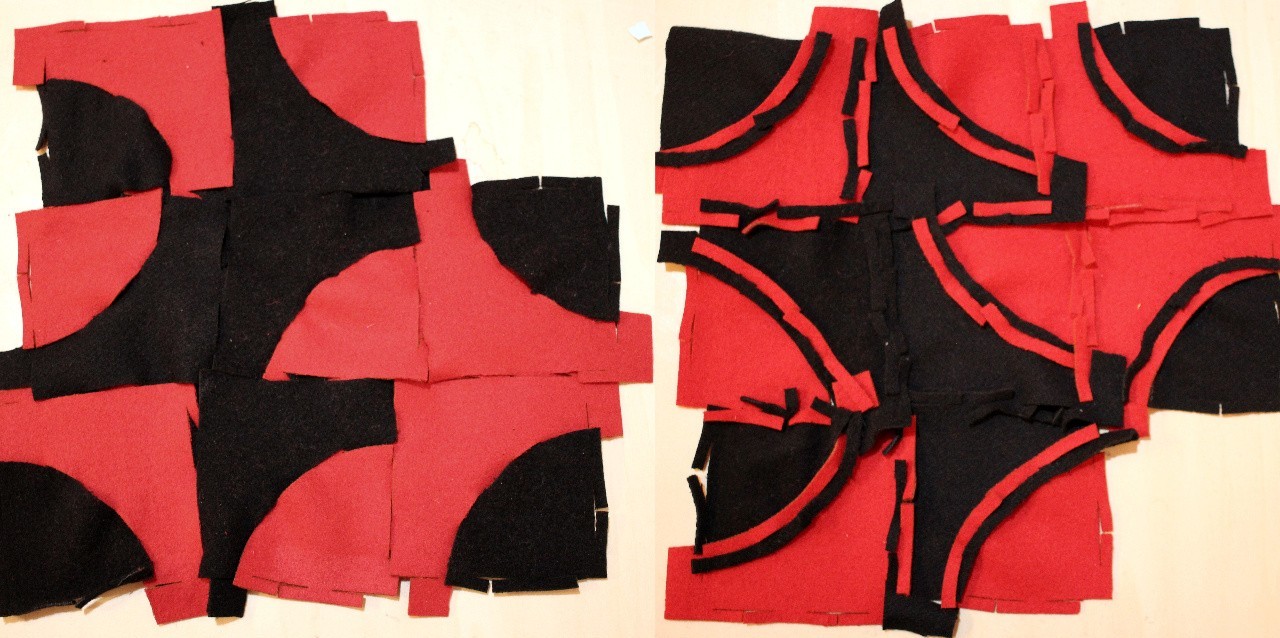
The first felt assembly, on both sides
Back to digital design
I realized the tabs were too long and thin, so I went back to Rhino to make them shorter and wider:
This is the final file, which you can download here, if you want to use or modify it: Patchwork modules. It is also available from the Open-source circular fashion platform.
Cutting and assembling
I decided I wanted to use only left-over material:
- Black thick wool I had from a coat I made a few years ago
- Fabric available at the Textile Lab (Pauline's fabric from last year, polyamide that she got from a second hand store)
- Furniture fabric samples that my mother had retrieved from a closing furniture shop

The materials I had at my disposal
I started by cutting the polyamide fabric from last year.
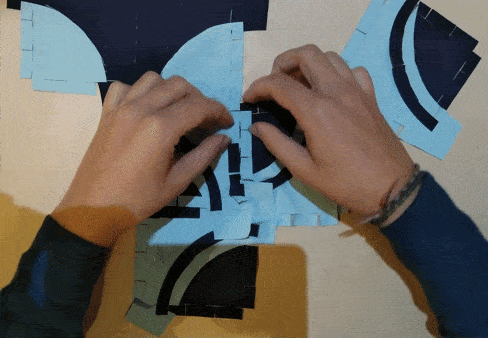
I thought the result looked... okay?, but this fabric is probably not the best for such big modules: the assembly does not hold really well.
Next steps: cutting more out of felt and wool. Maybe on a bigger machine? I might go and buy fabric that would allow me to have a color coherence, letting go of the "only using leftover materials" part...
What I could improve
😞 I'm not super happy with the result. I feel like I spent a lot of time designing, but I still should have spent more... And yet I did not have time to cut nearly enough fabric! There are also so many other ideas I wanted to explore ; I would have liked 3 more weeks for this one. I would have liked to experiment more practically, and go all the way to making a real garment... but the week is already over!
🌈 Not sure I like the colors, but of course by re-using only materials that I could scrape in a few days, I was going to have to compromise on this. Like I was saying above, I might end up buying some fabric for this if I finish it.
🤓 I should optimize the layers so that it takes less time to laser-cut... I had not anticipated the time it would take (20 minutes for 4 modules on the Zmorph we have here.)
Resources
You can download the final modules here: patchwork-modules.dxf. It is also available from the Open-source circular fashion platform.