10. Wearables
📆 2020 - November 24th to December 1st
What I did this week
Two e-textiles swatches with actuators 💡📢
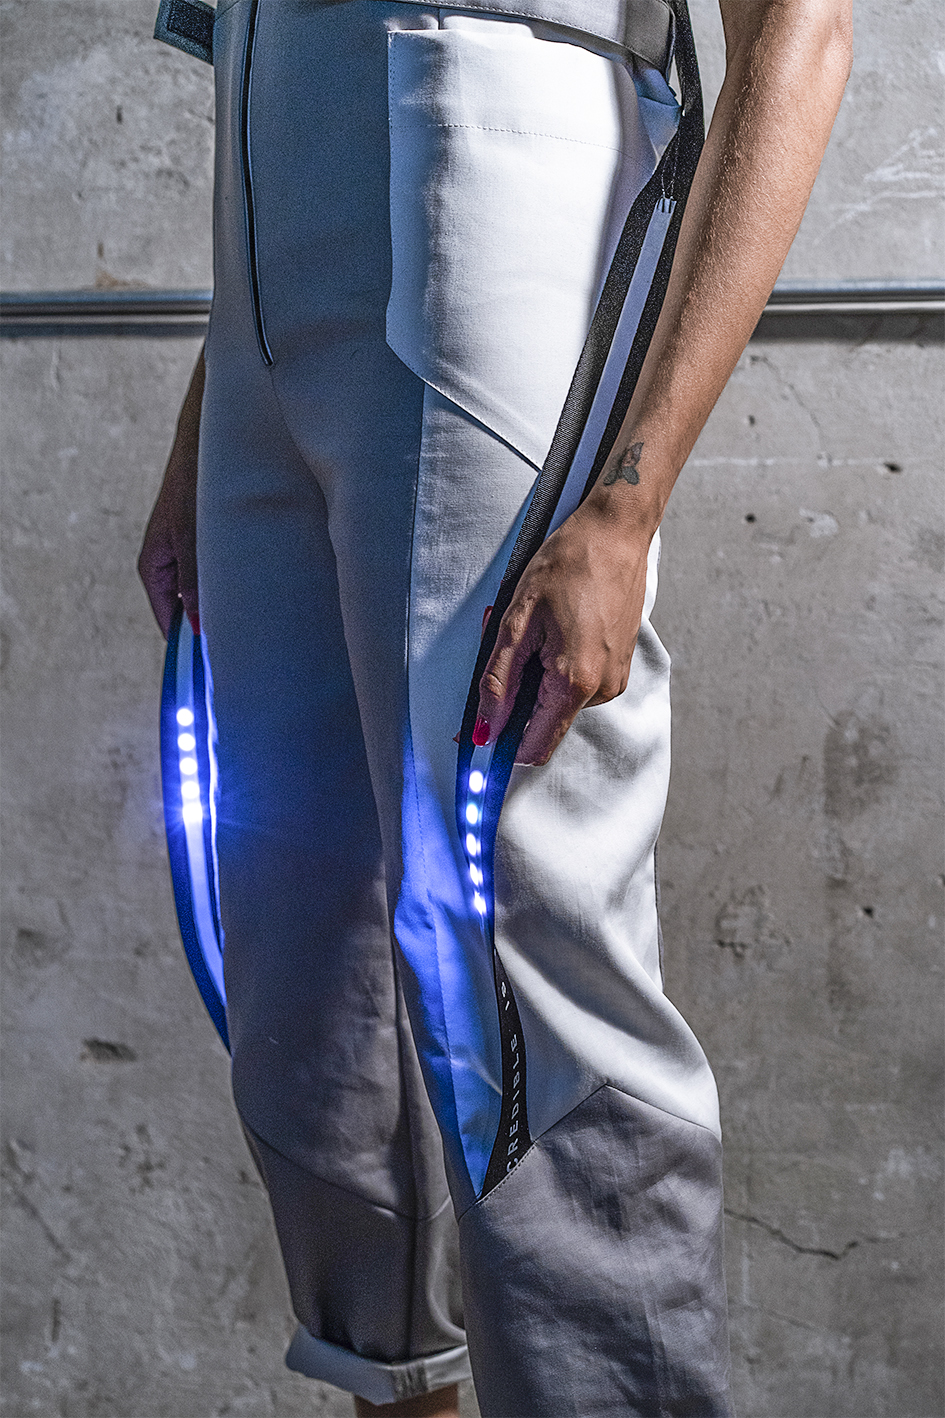
The first one controls neopixel LEDs with a pressure sensor:
The second one is a fabric speaker controlled by the Arduino Uno:
How did I get there?
This week's lecture was the second one with Liza Stark, and it delved deeper into the different types of actuators we might want to use for our e-textiles projects: lights, sound, thermochromic inks...
Here are a few examples: the Ceres jumpsuit by Wearable Media, that lights up when asteroids are close to Earth; the telltale quilt by Liza Stark, a quilt that tells you its stories; and Jingwen Zhu's dress that uses thermochromic inks to create patterns and colors that transform based on a personal diary app data.

Neopixels swatch
Emma's tutorial was really comprehensive on what we could do with the neopixels, and I had fun testing all the examples from the tutorial!

Initially I wanted to make a Swatch with neopixels controlled by a sound sensor I had at home: the KY-038.
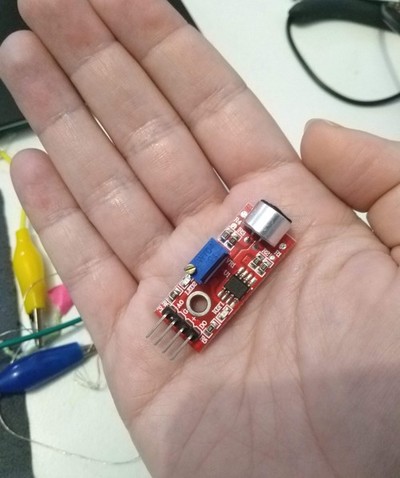
The sound sensor I have: a KY-038
I had already used it with the digital pin, to make an LED blink when clapping my fingers, but unfortunately I did not manage to get something consistent with the analog pin.
![]()
Trying to use the sound sensor with the neopixels
I wanted to have the lights be a certain colour under a threshold, and another colour and pattern over that threshold, but I was having trouble getting consistent values with the sensor. So instead I went with a fabric pressure sensor made with eeontex, and integrated in the swatch:
![]()
Here is the code I used:
#include <Adafruit_NeoPixel.h>

// Which pin on the microcontroller board is connected to the NeoPixels?
#define PIN             6

// How many NeoPixels are attached to the board?
#define NUMPIXELS      4

// When we setup the NeoPixel library, we tell it how many pixels, and which pin to use to send signals.
// Note that for older NeoPixel strips you might need to change the third parameter--see the strandtest
// example for more information on possible values.
Adafruit_NeoPixel pixels = Adafruit_NeoPixel(NUMPIXELS, PIN, NEO_GRB + NEO_KHZ800);

int delayval = 10; // delay for half a second

// variables:
int sensorValue = 0;         // the sensor value
int sensorMin = 1023;        // minimum sensor value
int sensorMax = 0;           // maximum sensor value
const int sensorPin = A0;    // pin that the sensor is attached to

int pixelHue = 0;
int pixelHue_delta =0;

const int numReadings = 10;

int readings[numReadings];      // the readings from the analog input
int readIndex = 0;              // the index of the current reading
int total = 0;                  // the running total
int average = 0;                // the average


void setup() {
  Serial.begin(9600);
  pixels.begin(); // This initializes the NeoPixel library.

  // initialize all the readings to 0:
  for (int thisReading = 0; thisReading < numReadings; thisReading++) {
    readings[thisReading] = 0;
  }

   // turn on LED to signal the start of the calibration period:
  pinMode(13, OUTPUT);
  digitalWrite(13, HIGH);

  // calibrate during the first five seconds
  while (millis() < 5000) {
    sensorValue = analogRead(sensorPin);

    // record the maximum sensor value
    if (sensorValue > sensorMax) {
      sensorMax = sensorValue;
    }

    // record the minimum sensor value
    if (sensorValue < sensorMin) {
      sensorMin = sensorValue;
    }
  }

  Serial.println(sensorMin);
  Serial.println(sensorMax);
  Serial.println("=================");
  // signal the end of the calibration period
  digitalWrite(13, LOW);
}


void loop() {
   int i;              // loop variable
   int value;          // analog read of potentiometer
   int display_value;  // number of NeoPixels to display out of NUMPIXELS

  sensorValue = analogRead(sensorPin);

  // subtract the last reading:
  total = total - readings[readIndex];
  // read from the sensor:
  readings[readIndex] = analogRead(sensorPin);
  // add the reading to the total:
  total = total + readings[readIndex];
  // advance to the next position in the array:
  readIndex = readIndex + 1;

  // if we're at the end of the array...
  if (readIndex >= numReadings) {
    // ...wrap around to the beginning:
    readIndex = 0;
  }

  // calculate the average:
  average = total / numReadings;
  // send it to the computer as ASCII digits
  Serial.print("Unmapped = ");
  Serial.print(average);

  average = constrain(average, sensorMin, sensorMax);

  //map the average onto a range the LEDs can use
  int newAverage = map(average, sensorMin, sensorMax, 0, 1023);

  Serial.print(" / Mapped = ");
  Serial.print(newAverage);

   display_value = int(newAverage  * NUMPIXELS / 1023);
   Serial.print(" / Display = ");
   Serial.println(display_value);

  // For a set of NeoPixels the first NeoPixel is 0, second is 1, all the way up to the count of pixels minus one
  // Calculating the delta between the colors, in function of the number of LEDs
  pixelHue_delta = 65536/(NUMPIXELS+1);

   for(i=0; i<display_value; i++){
        pixels.setPixelColor(i, pixels.gamma32(pixels.ColorHSV(i*pixelHue_delta)));
   }
   for(i=display_value; i<NUMPIXELS; i++) {
      pixels.setPixelColor(i, 0, 0, 0);    // turn off all pixels after value displayed
   }

   pixels.show(); // This sends the updated pixel color to the hardware.

   delay(delayval); // Delay for a period of time (in milliseconds).
}
Fabric speaker
I tried making fabric speakers with different materials: the first one with Madeira conductive thread made with the embroidery machine, the second one with copper wire and a couching thread, and the third one hand-embroidered with 3-ply stainless conductive thread:
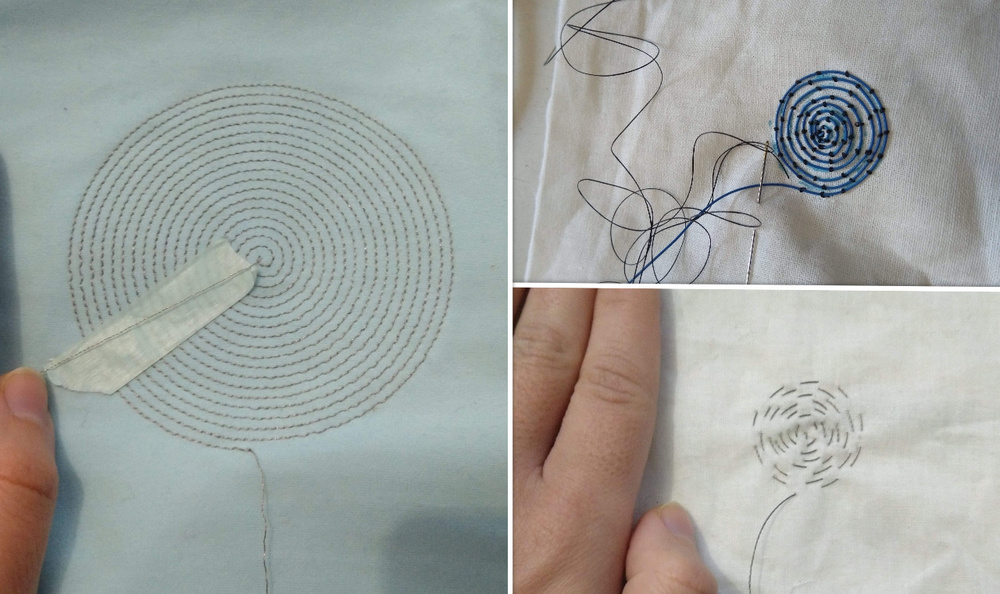
The different coils I made to use as fabric speakers
Emma's tutorials were again very useful on how to use the speaker, the driver circuit and the Arduino. To construct the circuit driver, I mostly followed Liza's slides, and Jessica Stanley's explanations.
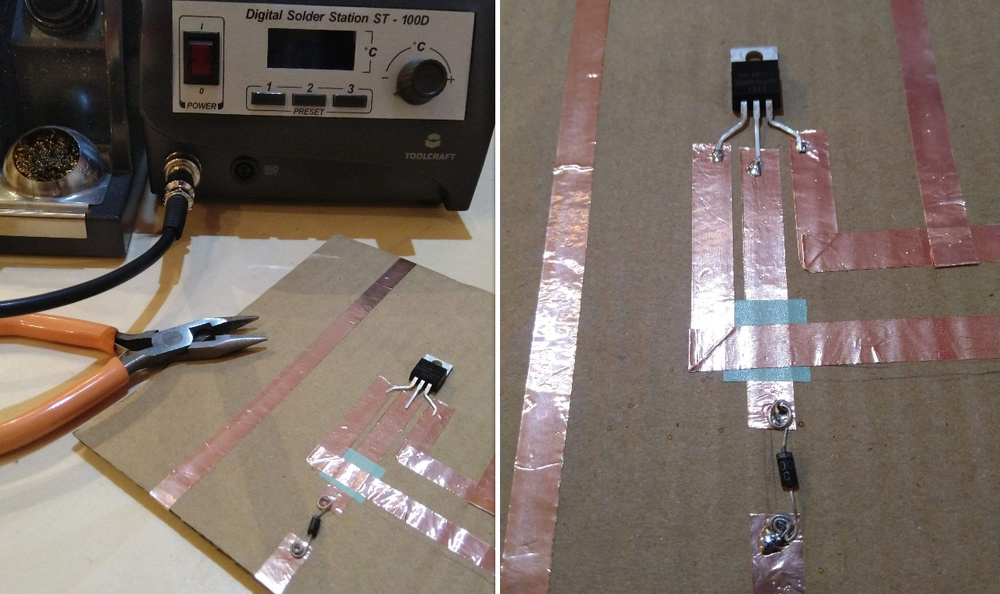
Creating the circuit driver and learning to solder!

Using the circuit driver with Emma during the first tutorial
Here is the driver circuit used with one of the speakers, the one that worked the best:
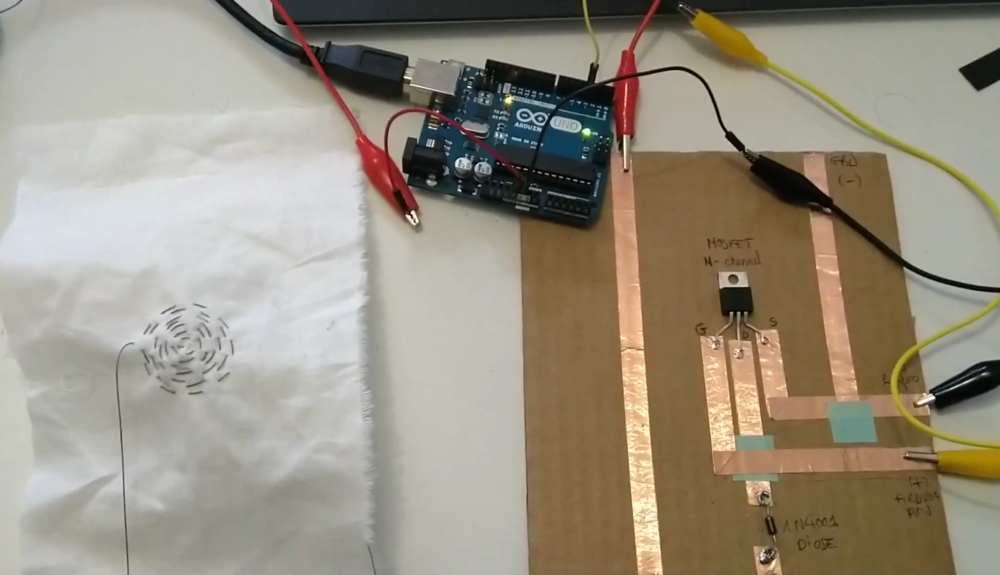
At first I used only a few 5mm neodymium magnets I had at home, and it worked! Really low, too low to record it, but it worked! So I bought bigger magnets, and this time I could record it, even if it is still really low:
Here is the video of the final test:
This speaker, which is the only I made which works, has a resistance of 8 Ohm, that I calculated while embroidering. I'd like to make a bigger one, but I'm not sure how to increase it.
For the moment, I use the Arduino to produce the sound, with the tone() function. You can find the code below, and download it here. I started from an example available in the Arduino IDE, the one in Digital/toneMelody.
/* Generating a melody with Arduino Tone() and the pitches library */

#include "pitches.h"

const int speaker = 3; //speaker to arduino pin 3

// notes in the melody:
int melody[] = {
  NOTE_DS4, NOTE_DS4, NOTE_DS4, NOTE_DS4, NOTE_B3, NOTE_CS4, NOTE_DS4, NOTE_CS4, NOTE_DS4
};

// note durations: 4 = quarter note, 8 = eighth note, etc.:
int noteDurations[] = {
  8, 8, 8, 2, 2, 2, 3, 8, 2
};


void setup(){

  pinMode(speaker, OUTPUT);

}

void loop(){

  noTone(speaker);     // Stop sound...
  delay(1000);        // ...for 1sec

  for (int thisNote = 0; thisNote < 9; thisNote++) {
    // to calculate the note duration, take one second divided by the note type.
    //e.g. quarter note = 1000 / 4, eighth note = 1000/8, etc.
    int noteDuration = 1000 / noteDurations[thisNote];
    tone(speaker, melody[thisNote], noteDuration);

    // to distinguish the notes, set a minimum time between them.
    // the note's duration + 30% seems to work well:
    int pauseBetweenNotes = noteDuration * 1.30;
    delay(pauseBetweenNotes);
    // stop the tone playing:
    noTone(speaker);
  }

}
In parallel, I started to follow Liza's tutorial on how to create an amplifier connected to an audio cable:
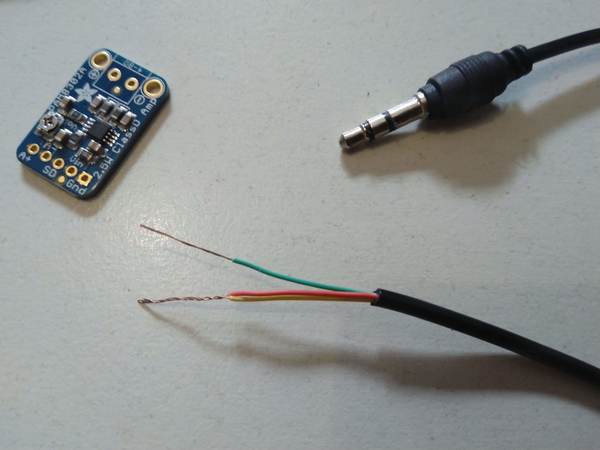
I haven't tried it, or even soldered it yet, because I did it from home, but it is the next thing I want to try!
Using the ATtiny
I want to use the ATtiny for the neopixels swatch. I haven't done it yet, because our ATtiny delivery got delayed...!
What's next
📢 More speaker tests, and testing the amplifier to be able to use other sources of sound
🤖 Using the ATtiny!
📊 Working with data: I loved the projects that had a data-oriented approach, for example the jumpsuit linked to real-time asteroid data, or the personal diary dress.
Useful links
- How to work with copper tape
- Turtle stitch, useful for making nicely-shaped fabric speakers:
- Kobakant speakers:
- Liza's fabric speaker
- Links on handmade electronic music and hardware hacking, by Nicolas Collins:
- The e-textile swatch exchange
- My Youtube playlist on electronics and e-textiles